What is Body-Aware Crop?
Body-Aware Crop is an innovative feature in Crop.photo that allows for more granular and varied cropping based on various body markers. Unlike headless crops that focus solely on making the face unrecognizable, Body-Aware Crop can generate a wide range of crops using markers like 'Head to Knees,' 'Entire Person,' 'Lower Half Body,' 'Upper Half Body,' and 'Mid-Half Body.'
When to Use Body-Aware Crop?
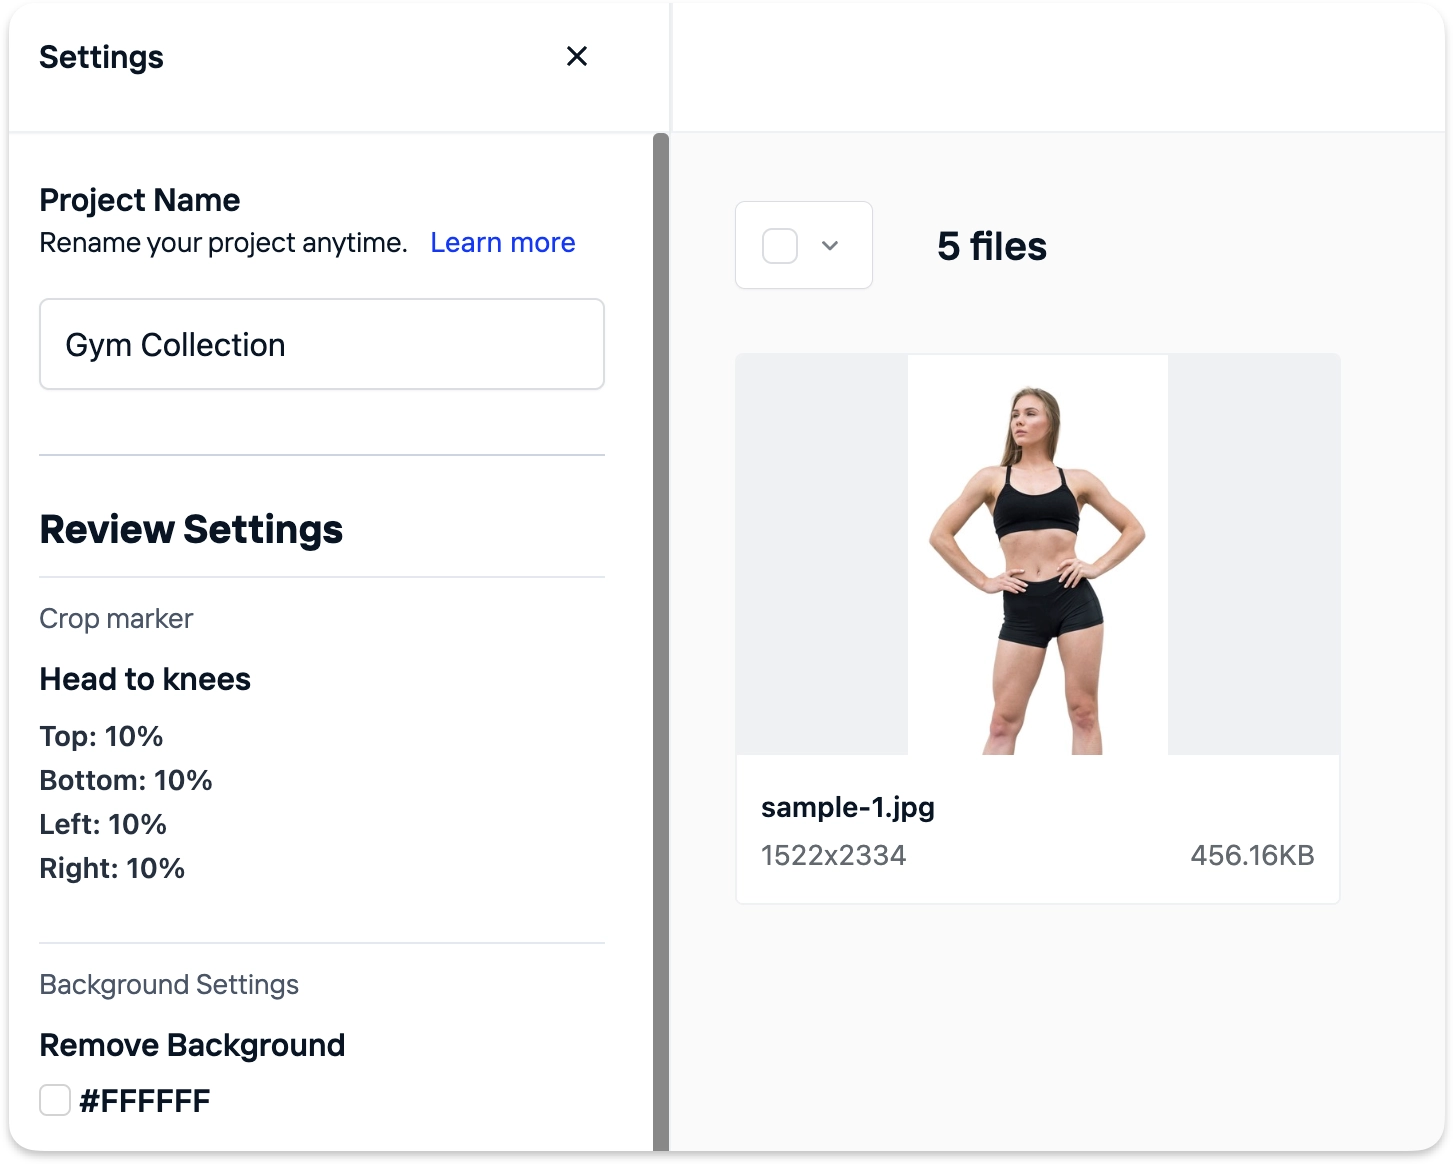
Example 1: Sports wear cropping focus on head to knees

Recommended Settings
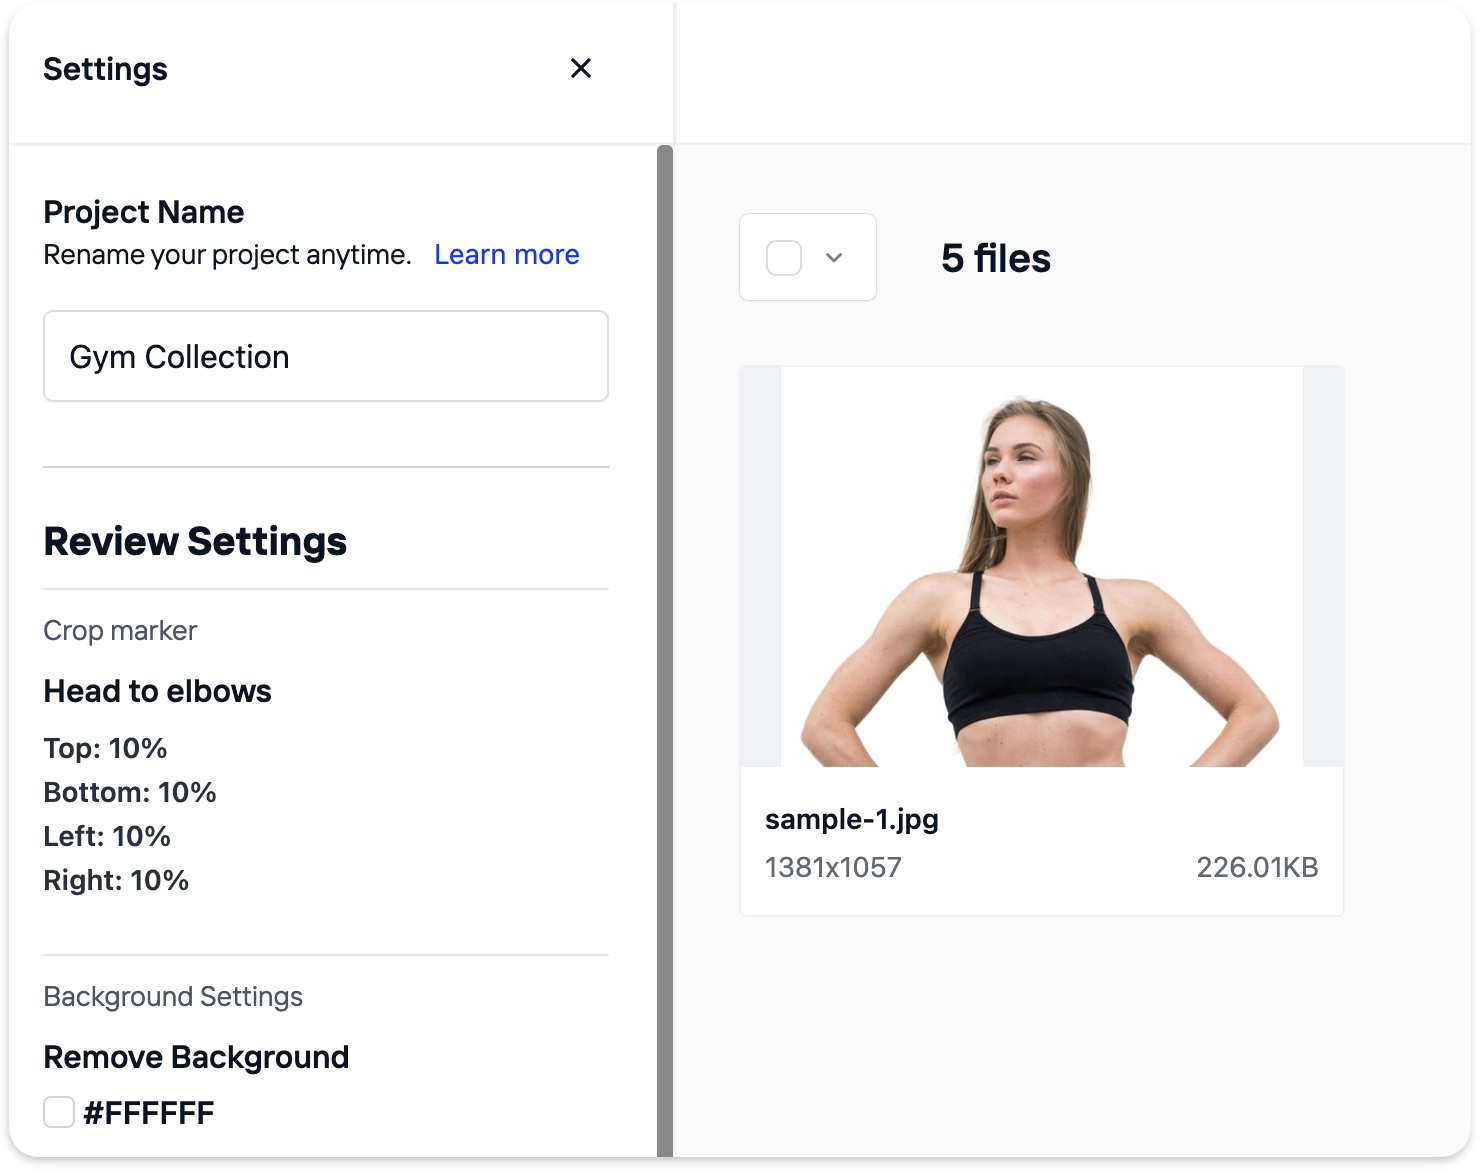
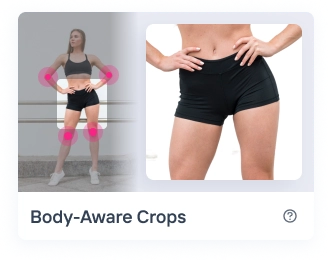
Example 2: Sports wear cropping focus on upper body
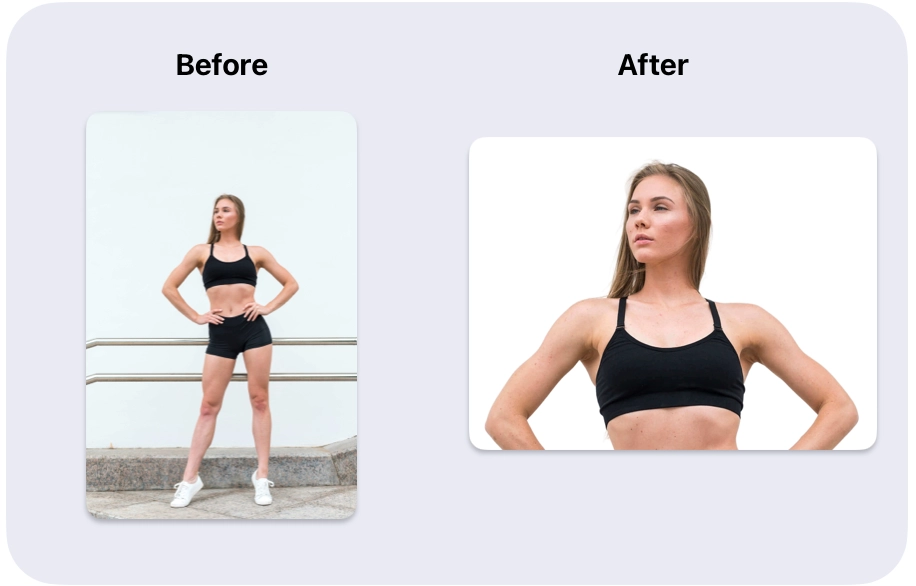
Recommended Settings
Example 3: Fashion photography showing closeup on Skirt
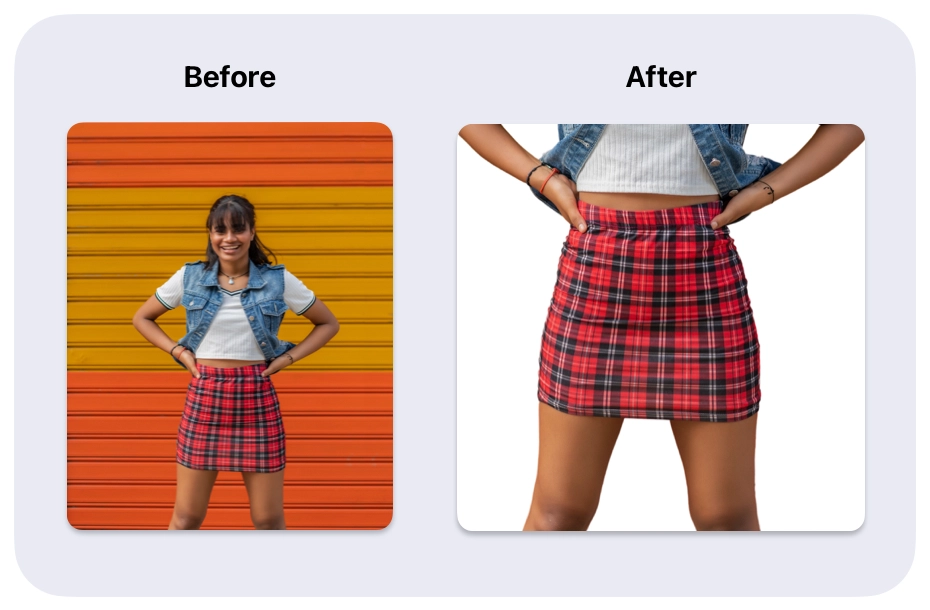
Recommended Settings

Suitable for
- Lingerie and underwear brands focusing on detailed product presentation.
- Retailers advertising multiple products on a single model, such as necklaces, shoes, and clothing items.
- Fashion photography that requires a variety of crops to highlight different clothing pieces on a single model.
- Athletic gear companies showcasing multiple items like running shorts, athletic shoes, and performance wear.
- E-commerce platforms in need of versatile cropping options to cater to varied product listings.
- Educational or Training Material: Cropping various parts of the body to highlight posture or positioning in physical education, medical training, or dance instruction tutorials.
How to Configure Body-Aware Crop?
Step-by-Step Guide for Body-Aware Crops
Before diving into the nitty-gritty of Body-Aware Crop, do yourself a favor and check out our Getting Started Guide. Trust us, it'll make the journey ahead a smooth ride!
Step 1: Create Body-Aware Crop Automation
Click on the "Body-Aware Crop" automation option, designed precisely to crop model images using body-part markers recognized by Crop.photo AI.
Step 2: Configure a Body Part Crop Marker
In the next couple of steps you will be configuring the crop configuration using pre-existing preview images from our collection.
Learn more about preview or sample images used by Crop.photo here.
All the examples below use our Preview image to help you setup the crop.

For cropping specific body parts, markers like lower, mid, and upper body rely on advanced AI algorithms to identify key body landmarks such as shoulders, elbows, waist, and knees.
These landmarks are used to construct a bounding box around the targeted area. Your specified crop margins then define the actual crop area relative to this bounding box. Importantly, the crop settings automatically adjust based on the size of the model, ensuring a uniform crop regardless of the model's height or build.
Advanced Settings
Use these to setup the crop margins relative to the purple bounding box mentioned above.
Step 3: Output Size
Choose Output Size: Select your preferred custom output sizes. You can add multiple output sizes for convenience.
Learn more about outputs.
Step 4: Upload & Start Crop
Click "Next" to proceed and start uploading your images.
- Review and Start Cropping: Review the configuration on the left and once the files are uploaded, click "Start Crop" to kick off the automation
- Wait for Cropping to Complete: Allow the system to complete the crops. This may take a minute or two depending on the number of files.
Note: The initial startup time for our AI models is typically 30s-1min independent of number of images. So 1 or 10 images may take similar time.
Learn more about how to upload your images.
Step 5: Download Your Crops
Once cropping is done, click "Download all" to obtain all your headshot extracts.
Learn more about downloads.
Tips and Tricks 🌟
1, Output image has more margin around the object
If your output image has more margin than desired, create a new project and adjust the "Margin Settings" to suit your need. Experiment with the automation on a few images to find the ideal settings.
2. Reuse Configurations: You can easily duplicate the settings for a future project. This feature saves you time by avoiding the need to redo your configurations.
Often you want to uncheck duplicate media and just duplicate the configuration:
This allows you to add new files and do a quick batch crop with already tuned settings.
Still Facing Issues?
If you're not achieving the desired results, don't worry. Reach out to us through the in-app chat icon. Our AI experts are available to assist you in real-time and will guide you through the process. They will guide you through the process to ensure a successful outcome, helping you complete your tasks without any obstacles.
Not Your Crop of Tea? 🌱
Explore the other crop automations we offer to find your perfect match!


